
The layout
Switch to the Editor tab at the top. Three areas: the monitor (the finished frame at the playhead), the panel on the left with four tabs — Components, Effects, Tools and Properties — and the timeline along the bottom. Nila's dock on the right becomes her finishing checklist.
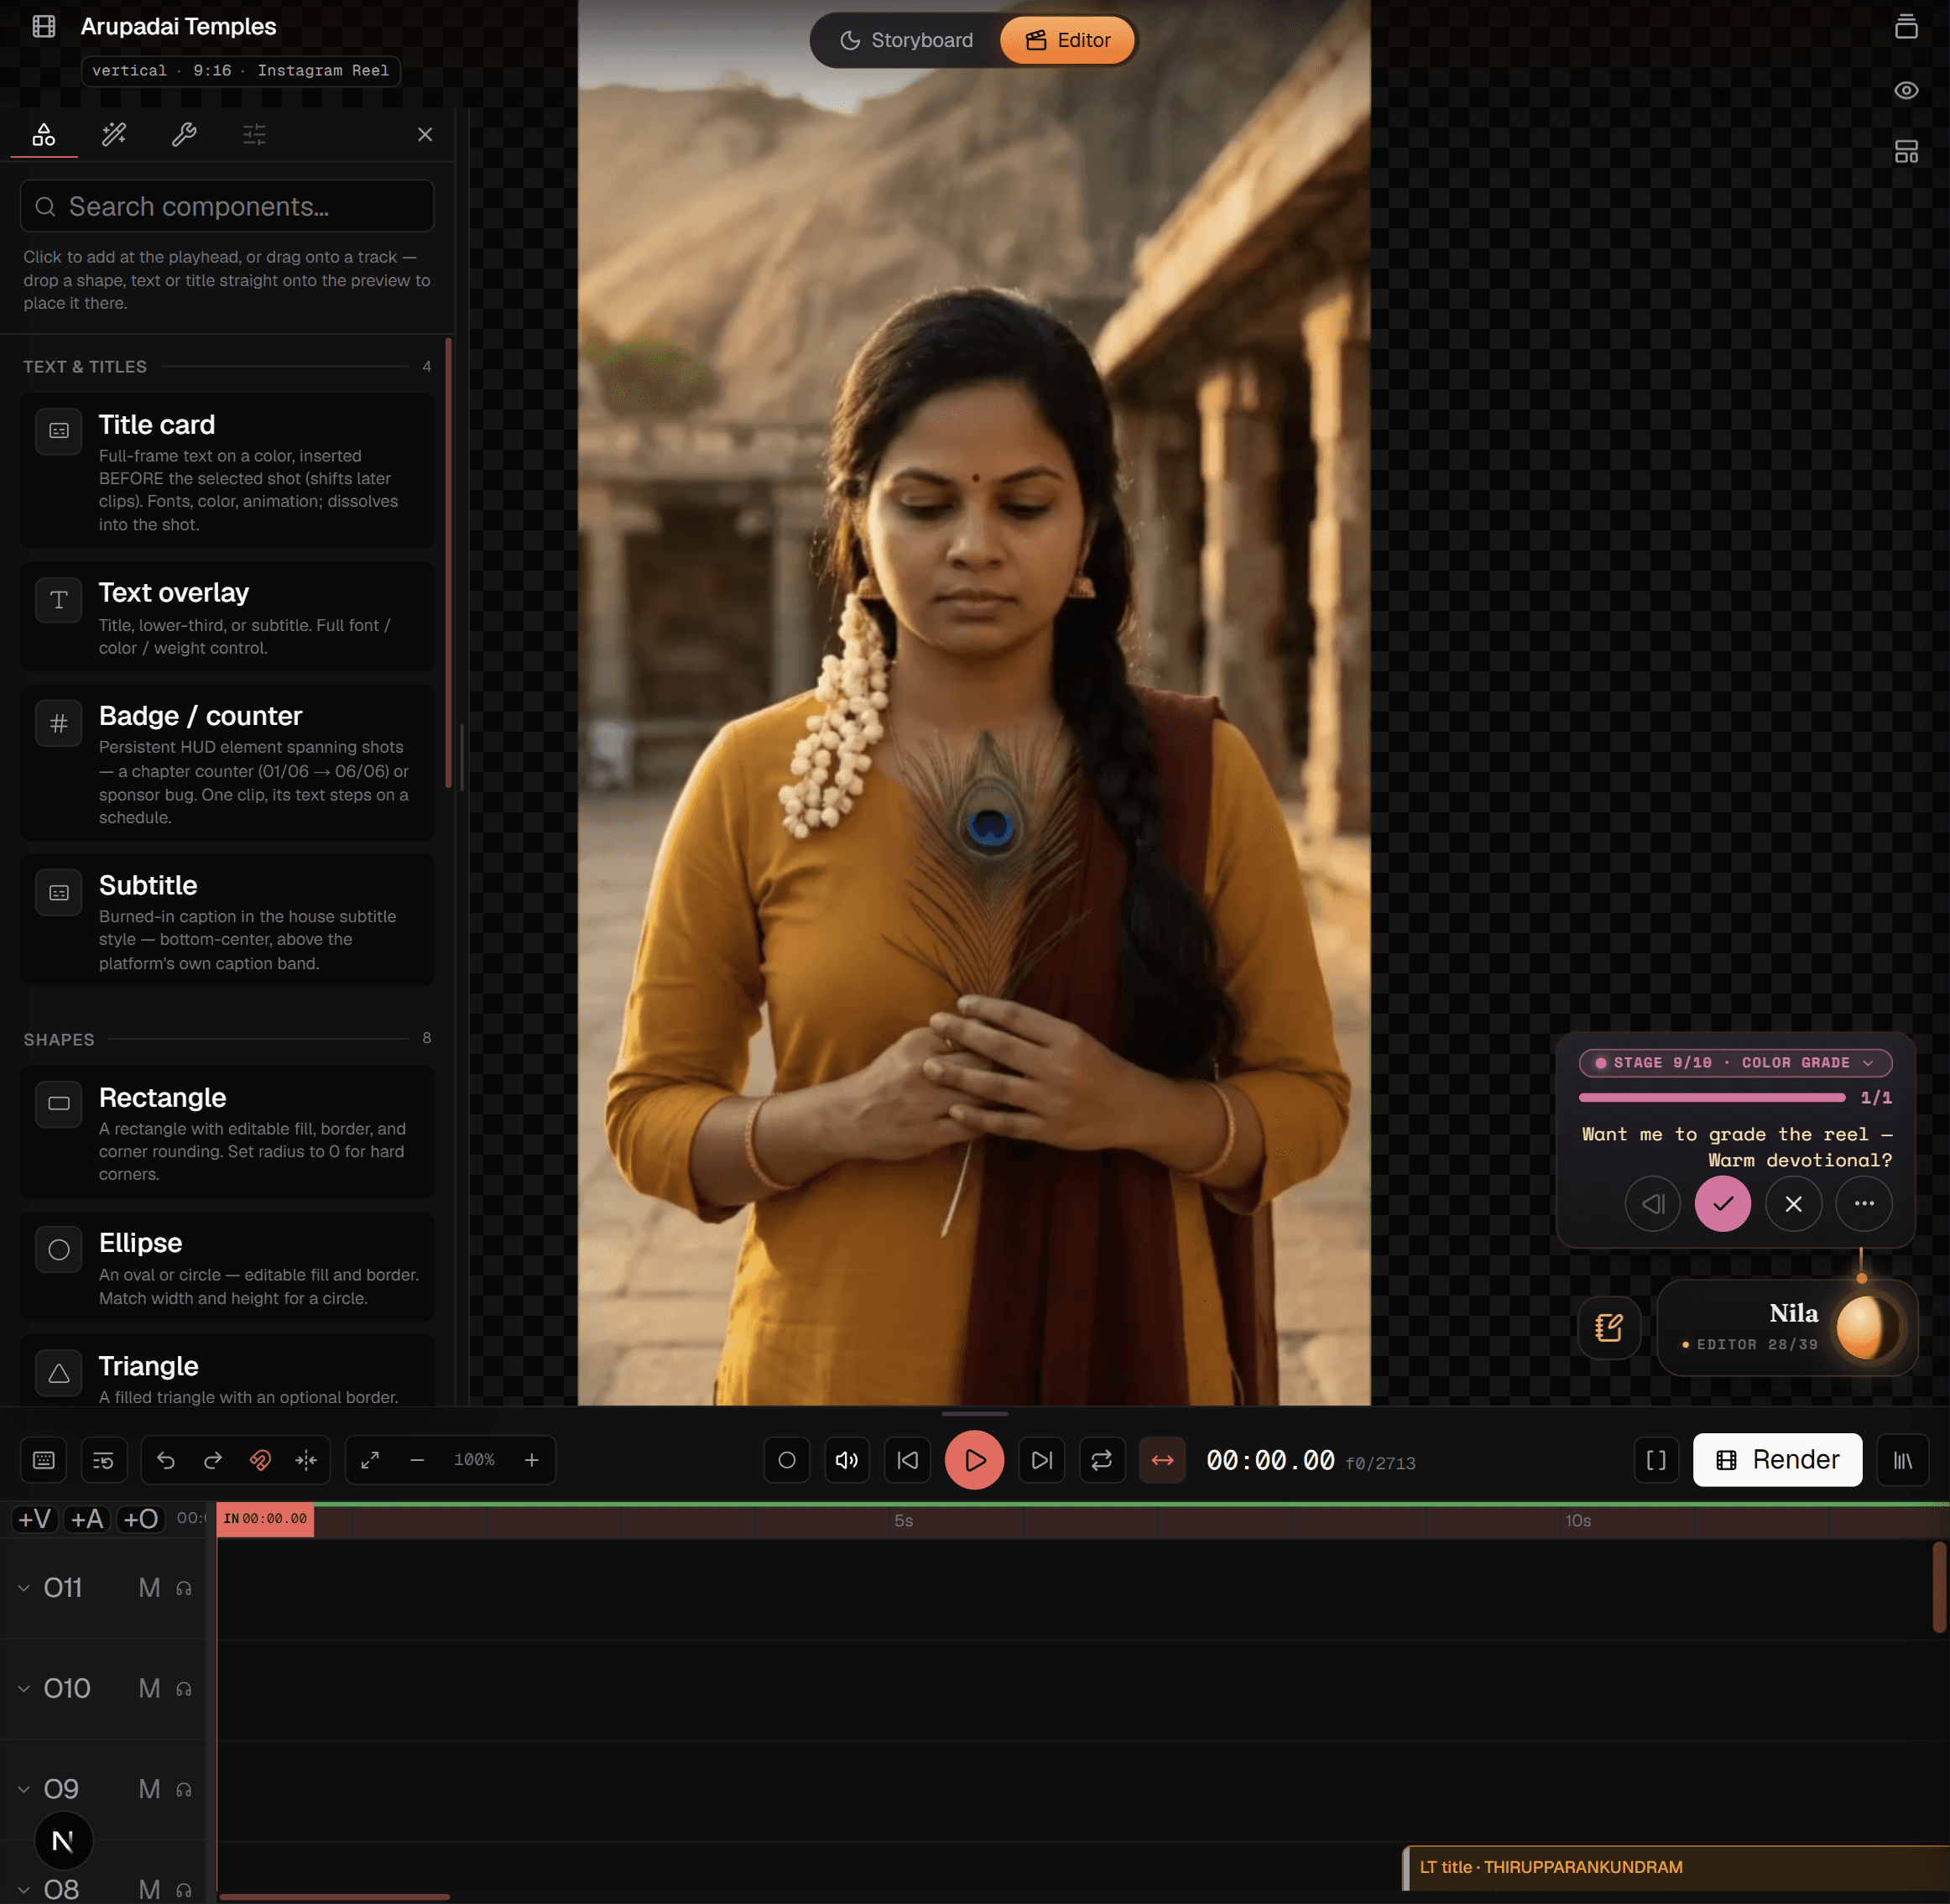
- Space plays and pauses. ← → step a frame; Home / End jump to the start or end. The Follow playhead button keeps the timeline scrolled to the playhead during playback.
- Zoom the timeline with − and +, or Fit to width. Snapping (toggle in the toolbar) makes clip edges snap to each other and to the playhead.
- Undo and redo are always one click (⌘Z / ⇧⌘Z). Every edit saves as you go.
Tracks
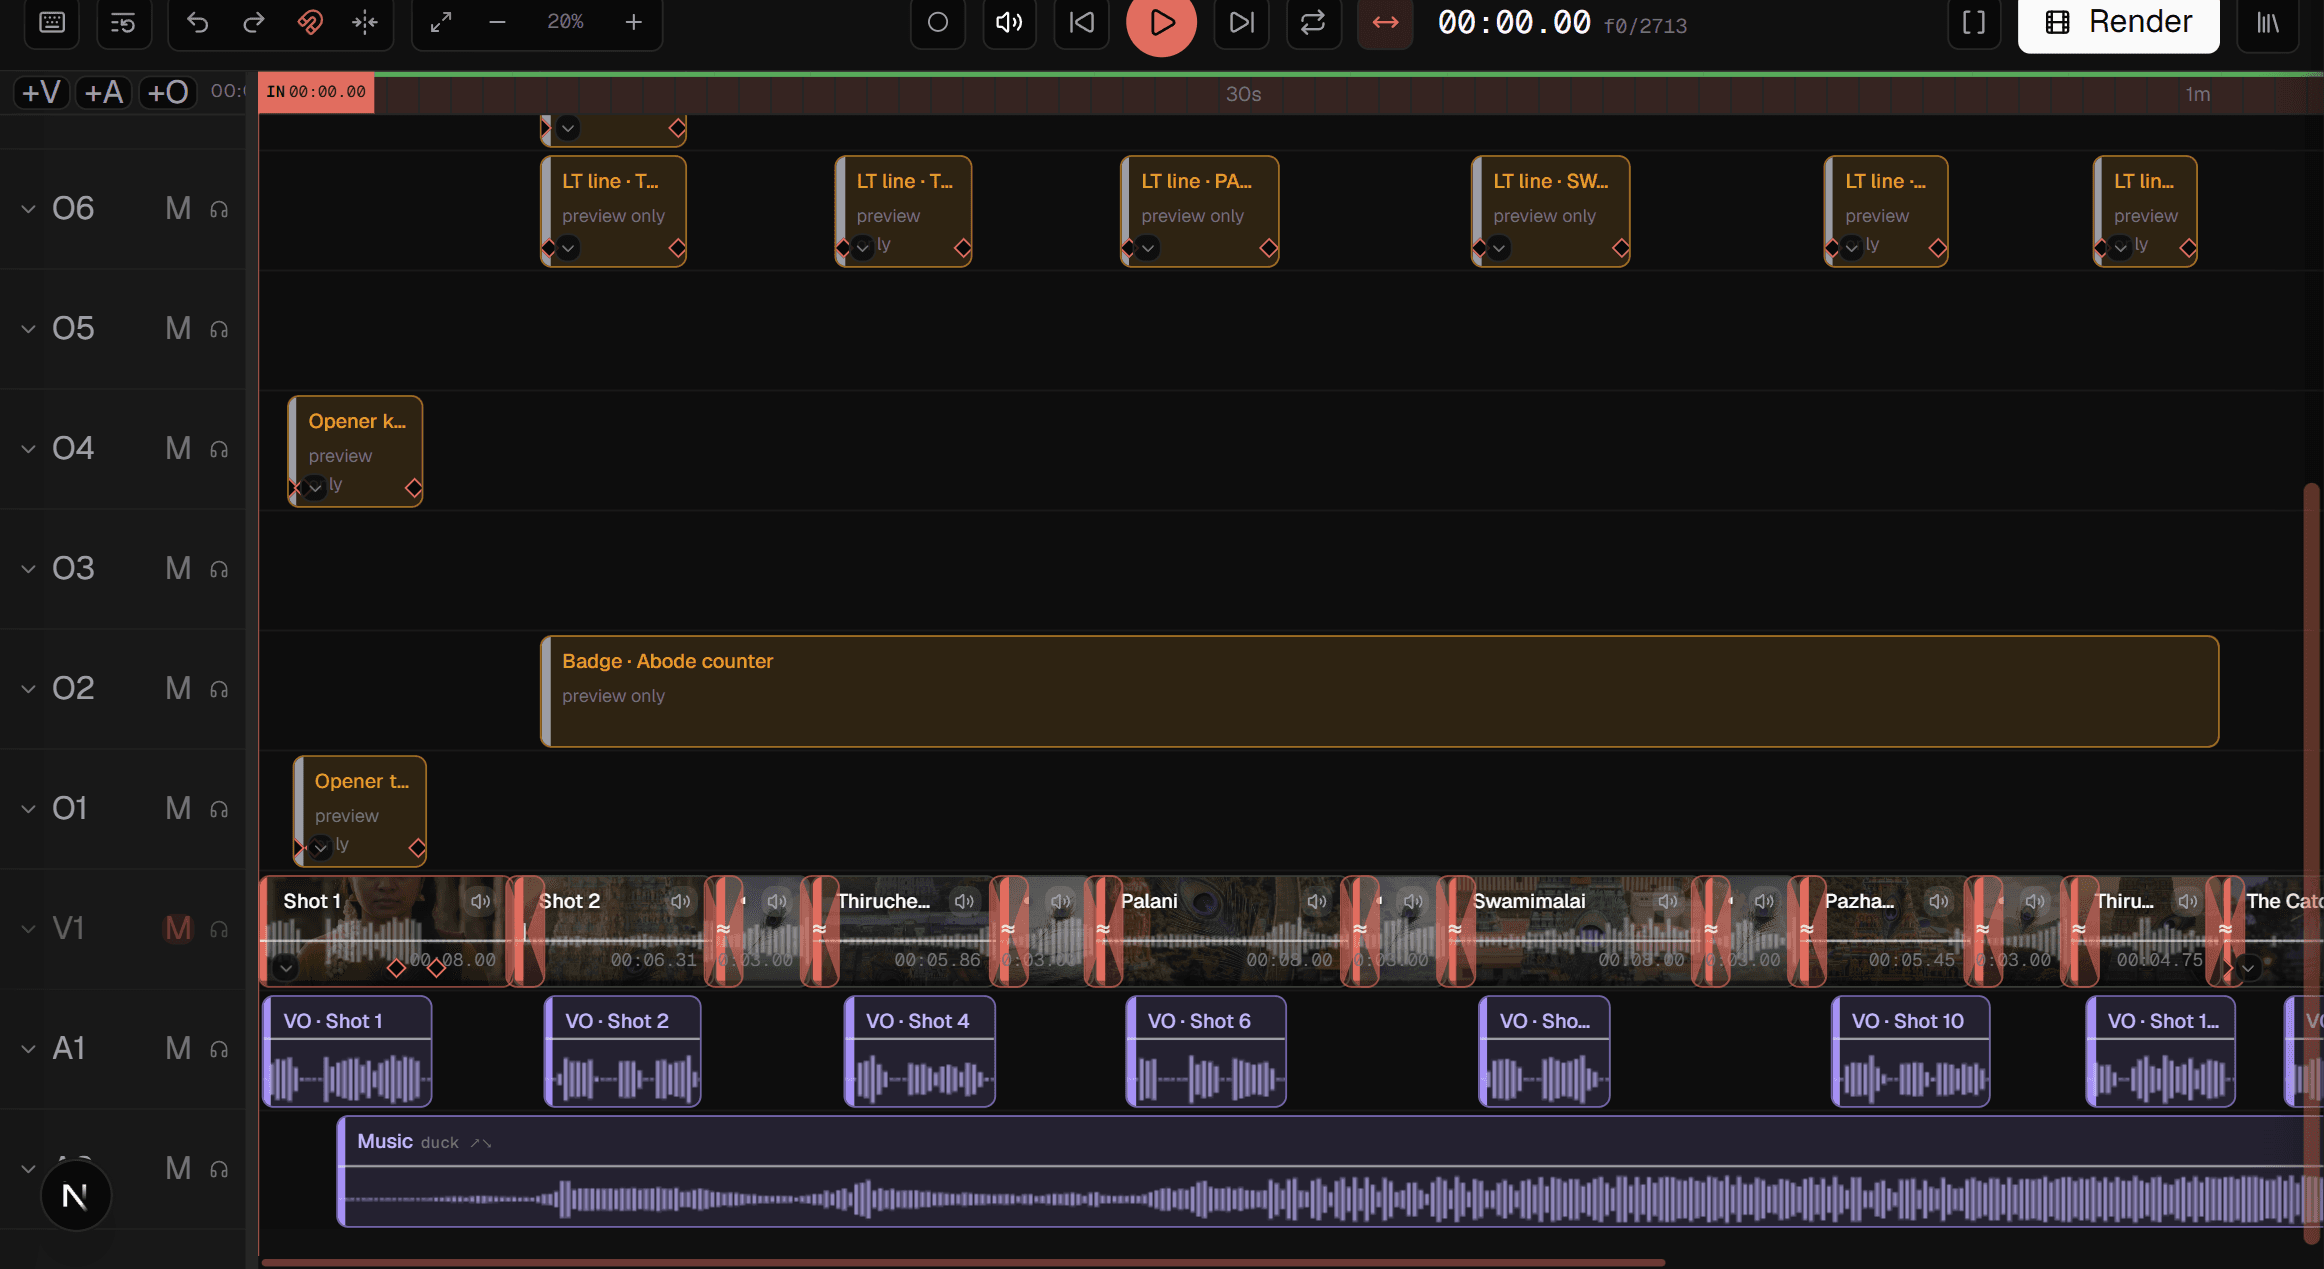
The timeline is built from tracks, top to bottom. Each track header has Mute and Solo — solo any track and only soloed tracks play — and can be collapsed to a thin strip. Add tracks with the +V, +A and +O buttons above the headers. The Rebuild from storyboard button re-lays the takes in story order if you want to start the cut again.
- Video (V1, V2 …) — the footage: your takes, one clip per shot. Trim edges by dragging, reorder by dragging clips along the track.
- Overlay (O1, O2 …) — graphics lanes that float over the footage: titles, lower thirds, text, badges, subtitles, shapes and watermarks. Add as many as the design needs; higher lanes draw on top.
- Audio (A1, A2 …) — the sound. Clips carry a role that places them automatically: shot audio, voice (narration), dialogue, music and ambience. A music clip marked duck lowers itself under any voice that overlaps it.
Components: what you can drop on a track
The Components tab is a library of things you drag onto the timeline. Drop a transition between two clips; drop everything else where you want it to start, then set its length by dragging its edges.
- Video transitions — Hard cut, Dissolve, Fade to black, Wipe, Wipe reveal, Zoom, Whip pan, Slide, Spin, Glitch, Blur and Flash.
- Text & titles — Title card, Text overlay, Badge / counter, and Subtitle. Text has a font, size, colour, alignment, highlight and an entrance animation: fade, rise, letter by letter, pop, slide or typewriter.
- Shapes — Rectangle, Ellipse, Triangle, Line, Star, Arrow, Polygon and a Panel (a soft backing box for text), with fill, gradient, opacity and layer order.
- Graphics — Watermark text and Watermark logo.
- Video effects — Colour grade: temperature, tint, hue, saturation and brightness over the clips beneath it.
- Audio — Music bed: an audio file laid under the cut with its own volume and fades.
- Utilities — Freeze frame: holds a single frame for as long as the clip lasts.
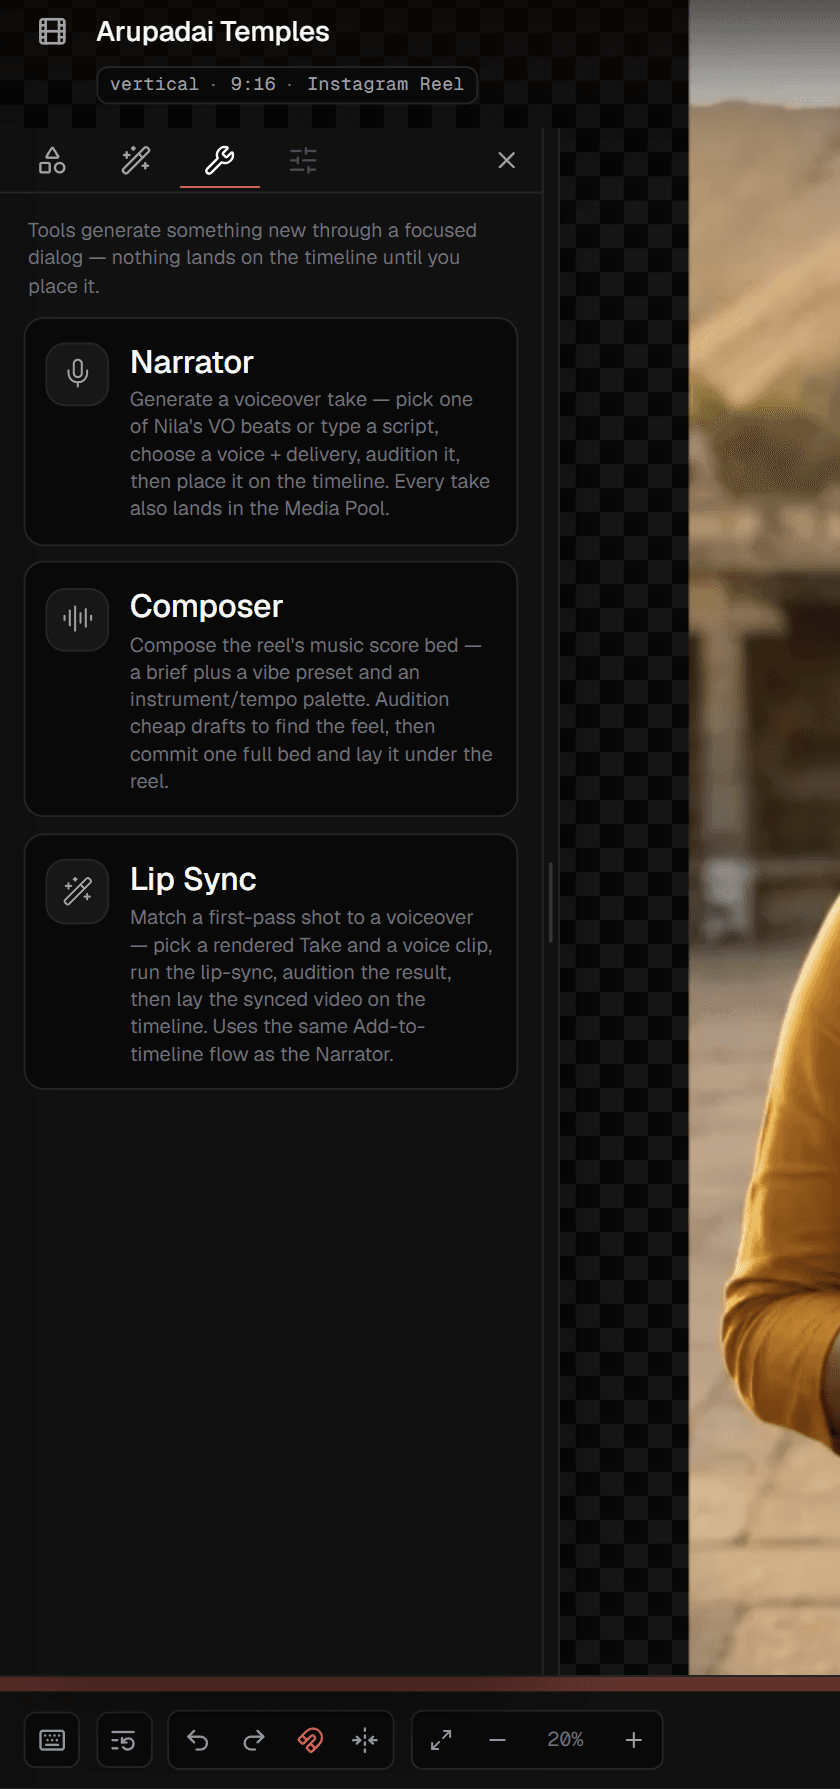
Tools: Narrator, Composer, Lip Sync
Tools generate something new through a focused dialog, then add it to the timeline. Each one also drops its result in the Media Pool so you can reuse it.
- Narrator — a voiceover take. Pick one of Nila's VO beats or type a script, choose a voice and a delivery, audition it, and place it.
- Composer — the music score. Give it a brief, a vibe and an instrument/tempo palette; audition cheap drafts until the feel is right, then commit one full bed under the reel.
- Lip Sync — match a rendered take to a voice clip so the mouth follows the words; audition, then lay the synced video on the timeline.
Cutting
- Split the selected clip at the playhead with S or B. Duplicate with ⌘D; copy and paste clips with ⌘C / ⌘V.
- Delete ripple-deletes — the gap closes. ⇧Delete removes the clip and leaves the gap. Close all gaps tidies a whole track at once.
- Nudge selected clips a frame at a time with ⇧← / ⇧→. M mutes the selection (or everything).
- Set the export range with I and O at the playhead; R loops it while you review.
Motion and keyframes
Any clip can move: a push-in on a take, a title that drifts, a shape that grows. Park the playhead, press ⇧K (or turn on Auto-keyframe and just adjust), and a keyframe is written. Drag a keyframe to retime it, click it to seek there, right-click it for easing. Audio has the same idea: volume points you drag on the clip, with their own easing.
Finishing with Nila
Nila's dock lists the finishing stages in order. Each is optional; each has a one-click default she proposes, and each maps to something above:
- Shot transitions · Motion & keyframes · Titles & text · Voiceover & dialogue · Subtitles · Music score · SFX & stingers · Audio mix · Colour grade · Export.
Rendering
Choose Export, confirm the range (the whole film, or the In/Out points you set), and render. Rendering happens in the cloud; you can leave the page and come back. Finished renders appear under Rendered videos with a download link, watermark-free on every plan.